Android Basics: RecyclerView - II, adding onClick to list items
May 29, 2020
Tags: Android, Android Basics, Github Repository App, RecyclerView, On Click,
In this article I go over how to make list items respond to clicks. I am adding the click functionality to a RecyclerView that displays a list of Github repositories. If you want to follow along you can get the starter code here and try to implement it yourself.
If you would like to know how to create a RecyclerView check my previous post.
If you are working in Kotlin go over to How to add onClick to RecyclerView list items in Kotlin.
Overview
Setting up onClick in a RecyclerView is not as straightforward as setting up onClick on a button, but once you create it yourself it makes a lot more sense. What we are doing here is calling interface’s function in the ViewHolder’s onClick and defining what this function will do in the activity by implementing the interface in the activity.
- Create an interface
ListItemClickListenerwith anonClickListItem(can be named anything) method. - Create a
ListItemClickListenermember variable of the adapter calledmOnClickListener. - Add a
ListItemClickListeneras a parameter to the constructor and store it inmOnClickListener - Implement
View.OnClickListenerin the ViewHolder class and additemView.setOnClickListener(this);in the ViewHolder constructor. - Override
onClickin the ViewHolder class and get the position being clicked usinggetAdapterPosition()and use the position to callmOnClickListener.onListItemClick(position), the function in the interface we created. - In the activity where the RecyclerView was created implement the
ListItemClickListenerinterface. - Fix the adapter initialization since we changed the adapter constructor in the activity
onCreate. - Override
onClickListItem(int position)and use the position of the item clicked to do something with it. Since the data to the RecyclerView is usually passed from the same activity, we can use the position to get data of the item that is clicked.
In the Adapter
In the adapter class we add the following
Step 1: Create an interface
We first want to create an interface ListItemClickListener(can be named anything). Creating an interface allows us to use the interface functions in the current class and write the function definition elsewhere.
    interface ListItemClickListener{
        void onListItemClick(int position);
    }
Step 2: Create an instance of ListItemClickListener
Create a member variable of type ListItemClickListener at the top of the Adapter(or wherever other member variables are defined), so that we can use the function onListItemClick.
final private ListItemClickListener mOnClickListener;Step 3: Add a ListItemClickListener variable to the adapter constructor parameters
Change the constructor of the adapter to accept a parameter of type ListItemClickListener, in our case we create one since we did not have one.
In further steps we implement ListItemClickListener interface in the MainActivity(create a function definition for onListItemClick) which means the MainActivity becomes a ListItemClickListener and when we initialize our adapter in the activity we connect the activity and the adapter.
    public RepositoryAdapter(ListItemClickListener onClickListener){
        this.mOnClickListener = onClickListener;
    }
Step 4: Implement View.OnClickListener in the ViewHolder class
Implement onClickListener in the ViewHolder class
public class RepositoryAdapterViewHolder extends RecyclerView.ViewHolder implements View.OnClickListenerIn the ViewHolder constructor add itemView.setOnClickListener(this);.
    public RepositoryAdapterViewHolder(@NonNull View itemView) {
        super(itemView);
        ...
        ...
        itemView.setOnClickListener(this);
    }
Step 5: Override onClick in ViewHolder
and then override onClick in the ViewHolder, since we implement View.OnClickListener
        @Override
        public void onClick(View v) {
            int position = getAdapterPosition();
            mOnClickListener.onListItemClick(position);
        }
In the Activity
Step 6: Implement ListItemClickListener interface in the Activity
Now we just need to implement the interface we just created in the activity and fix the RecyclerView Adapter initialization
public class MainActivity extends AppCompatActivity implements RepositoryAdapter.ListItemClickListenerStep 7: Fix RecyclerView Adapter initialization
Add this to the RecyclerView adapter initialization. We are supposed to provide an instance of ListItemClickListener in the adapter’s initialization and since we implemented ListItemClickListener our activity can be considered one.
mRepositoryAdapter = new RepositoryAdapter(this);Step 8: Override onListItemClick in the Activity
Finally we override onListItemClick and define what needs to happen when the list item is clicked.
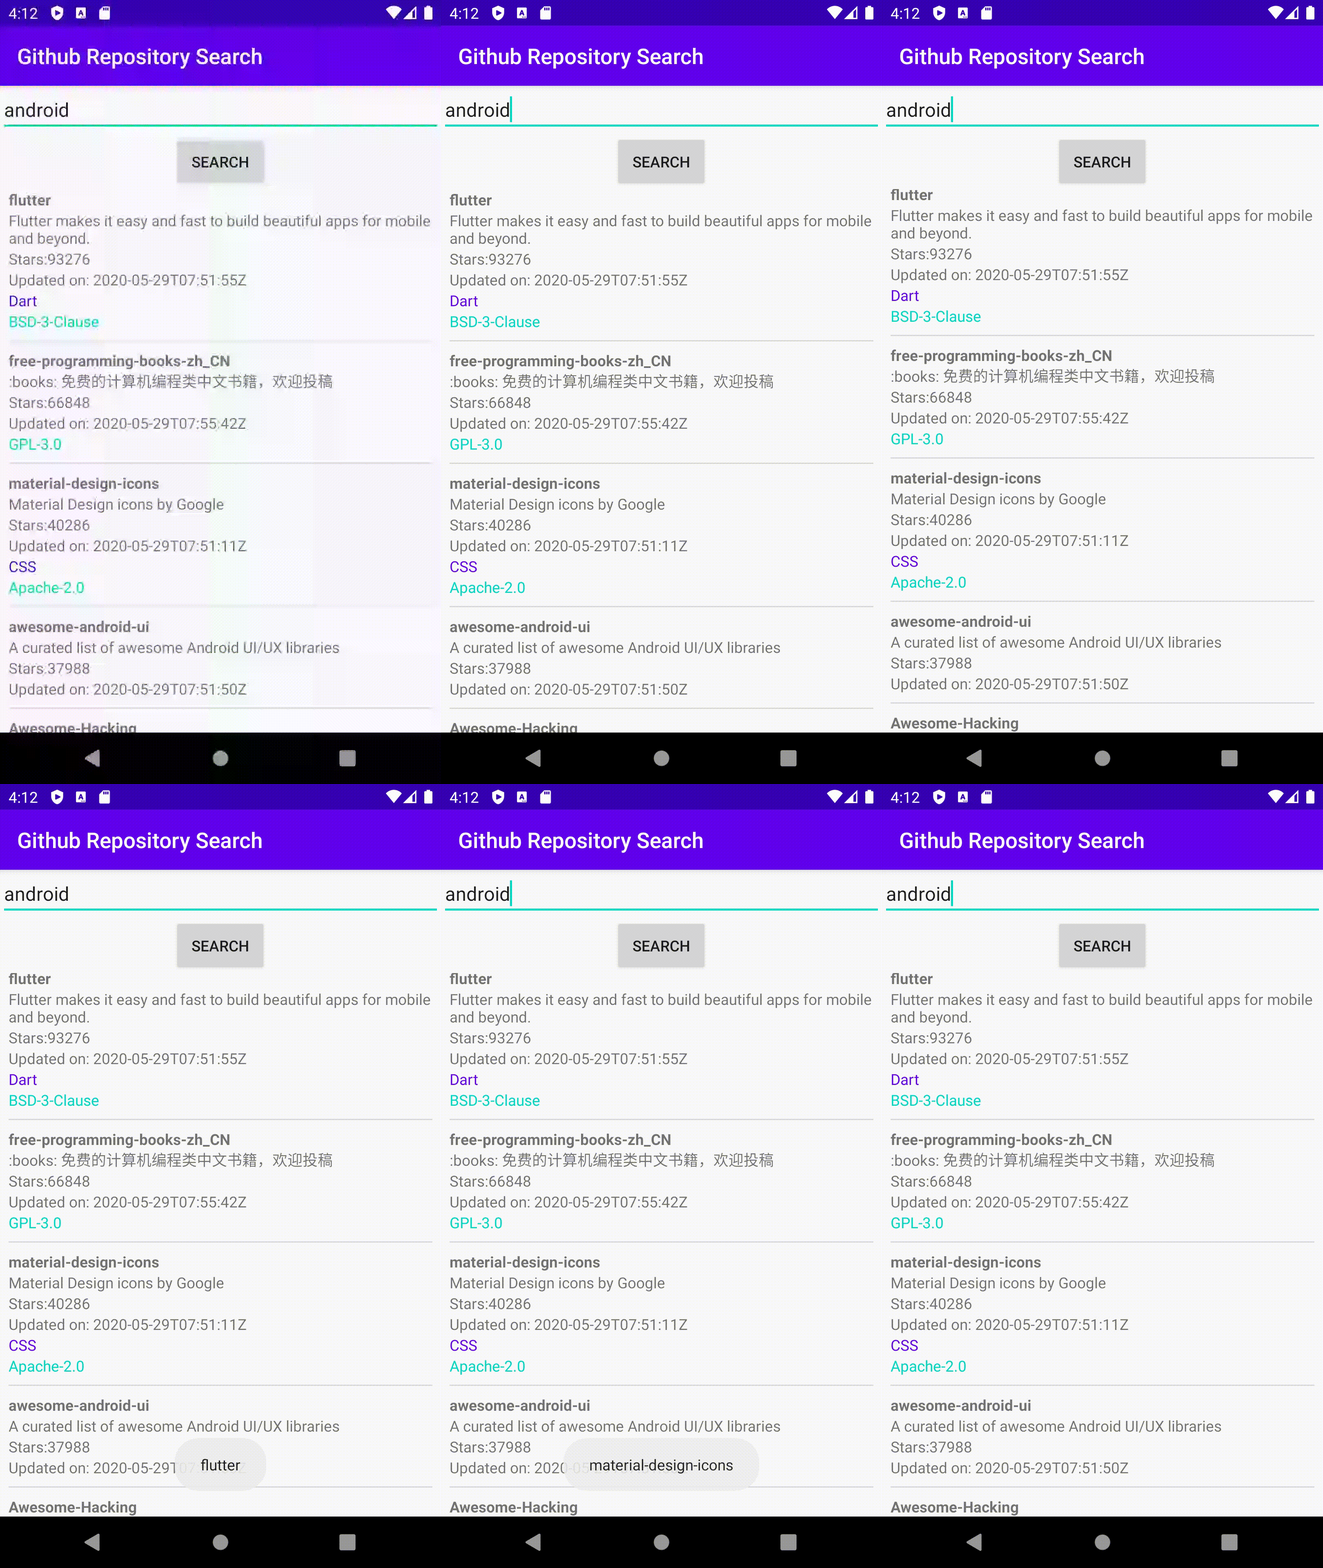
Here I am just showing a toast, we can do other things like start a new Activity instead.
    @Override
    public void onListItemClick(int position) {
        Toast.makeText(this, mRepos[position].getName(), Toast.LENGTH_SHORT).show();
    }
List Items are now clickable!

When we click on an item a Toast with the name of the repository is displayed. We could start a new activity with details of the activity, but to start an activity we need to create an intent. Intents can be used to start an activity in your own app or in some other app. In the next post let’s explore Intents.
You can find the code for everything we have done in this post here.
Hopefully you feel more comfortable with RecyclerViews. If you find any errors, have feedback or just want to say hi please don’t hesitate to leave a comment below.